


Bluetooth with More Bite - Adding an Original Apple BT Module to Your Hackintosh

This is a follow up to our Building a Socket 1155 Hackintosh article and deals with adding native Bluetooth support via a ‘hacked’ official Apple Bluetooth module.
Understandably, this isn’t for everyone and most folks will be happy to buy a third party dongle ala the BT-2279 or one of the more expensive (but somewhat harder to find) options from Belkin or D-Link (various reports online state that the DWT-120 / DWT-122 works perfectly but some say they have problems with waking from sleep – a possible deal breaker)
For us, the first problem was availability of either Belkin or D-Link modules in Kuala Lumpur – hunting around in both Low Yat and Digital Mall resulted in nothing but frustration as the only third party modules most folks carry are the cheap made in China versions which use the Cambridge Silicon Radio chipset but work with varying degrees of succsess.
As mentioned in our previous article, while the BT-2279 does work, it only allows 1 single BT device to be connected at any one time; kind of defeats the purpose of having Bluetooth especially if you plan to use both an Apple wireless keyboard and a Magic Mouse / Magic TrackPad – Another peculiarity with these cheap knock offs is the fact that certain 3 and 4 finger gestures results in a temporary freeze of the mouse cursor – As everyone knows, OS X without 3 and 4 finger gestures (especially in Lion) makes it almost unusable.
So what now?
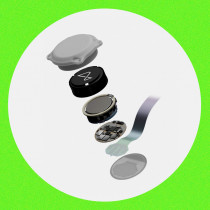
Since we couldn’t find either a Belkin or D-Link device the only option left was to hunt for a second hand official Apple Bluetooth module from a recent Intel based MacMini, MacBook or MacBook Pro – obviously looking for something like this at the 2nd hand computer parts shops in Low Yat is a further waste of time as everyone wil say yes, they have it only to come back 30 minutes later empty handed. Stick with eBay – we found a seller that had a second hand A1181 Blutooth module out of a MacBook with the A1114 cable plus the A1221 antenna in stock and would ship to Malaysia – Cost of the module, cable and antenna; USD15 - Cost of expedited UPS shipping; USD35 - having Bluetooth that just works; pricesless! Expedited UPS shipping actually works - total time taken from placing the order till receiving it was just under 7 actual days; nice.
On to the hacking!
With the Bluetooth module and antenna sorted, there’s still the issue of getting the device connected! The default voltage from a USB port is about 5v however the Apple Bluetooth module operates at 3.3v – You also need to change the proprietory connector to an internal USB header so you can plug this directly into your motherboard. Alternatively, you could wire the module to a standard USB cable and plug it in to any standard USB port on your machine. We made both.
The first issue you’ll need to sort out is the input voltage and the way to drop it to a more manageable level is through the use of some rectifier diodes (1N400x series). You’ll need 2 diodes as the forward voltage drop across each is about 0.7v so using two would bring your input voltage down to a more usable 3.6v (much love to KLKS from HackerspaceKL for the diode crash course). Where do you get these diodes from? The true hacker route would be to harvest them out of hardware you no longer need (we had a Sony Ericsson cellphone charger lying around that had 4 x 1N4007s) or head down to Radio Shack (or Pasar Road if you’re in Malaysia) and pick them up there – a set of 10 costs about USD1.

Tools of the trade – You’re going to need a soldering iron, solder, a desoldering tool (optional – we ended up getting by with a pair of small needle nose pliers) and a multimeter

Victim for harvesting – Our Sony Ericsson charger with the 4 x 1N4007 diodes at the front

Harvest Rewards – 4 diodes un-soldered and ready to go! One of the first problems you’ll encouter with harvested parts though, is the reduced surface for re-soldering

Tiny surface area - We had to extend the anode on ours with a bit of wire harvested from the charger as well.

New home - We found an old ADSL splitter which would make a perfect housing

Fresh fruits - In the end we decided to buy a bunch of new diodes, so we picked up a set of 1N4001s and 4007s – they’re both pretty much identical in terms of forward voltage drop so use whichever you want.

All the space you need - Having new diodes to work with will make your soldering life a lot easier

Roomy – Our new step down rail with the Bluetooth module inside the ADSL splitter casing with lots of room for the excess wire

We needed to replace the proprietory Apple Bluetooth module connector with an internal USB header – We harvested this cable from a cheap ‘internal’ multi format memory card reader we picked up for USD3. Each internal header has pinouts for 2 USB devices but you’ll only be using one.

Wiring everything together
The connection should be as follows:
USB +ve (red wire) -> +ve (anode) on stepdown rail -> red wire from Bluetooth module
USB DATA –ve (white wire) -> GREEN wire from Bluetooth module
USB DATA +ve (green wire) -> YELLOW wire from Bluetooth module
USB –ve (black wire) -> black wire from Bluetooth module
Yes, the green and yellow wires from the Bluetooth module need to be SWAPPED! Apple has obviously chosen to ignore the color standards.

Tucked in – We had a bit of bubble wrap lying around which we used to seat the Bluetooth module on with some double sided tape.

Connecting the Bluetooth antenna – it’s a tiny little (aka fragile) U.FL connector so be careful

All done and ready to go!

Plugging it in – The position of the antenna is super cruicial to optimum reception! This was the intial placement however with the side panel on, link quality dropped dramatically and we ended up moving the antenna towards the back of the case.
It lives!
If everything was wired up correctly, your system should now have native Bluetooth with full wake from sleep support!
As mentioned above, the placement of the Bluetooth antenna makes a huge difference to the link quality – with the side panel of our case on and the antenna positioned towards the front, we would have major mouse lag problems with the MagicTrackpad (our BT keyboard however worked flawlessly regardless of where we placed the antenna). To improve reception, we moved the antenna towards the back of the case and immediately saw a huge jump in signal strength.

Antenna at front of casing (MagicTrackpad is yellow / BT Keyboard is green)

Antenna at back of casing (MagicTrackpad is red, BT Keyboard is blue)
Despite moving the antenna to the back we still had occassional BT lag issues especially when the DWA-556 PCI-e WiFi card was turned on (incidentally this device is detected as native Airport Extreme in 10.7). As such we’ve ordered a U.FL -> SMA cable which will allow us to connect the BT module to a 8db omni directional antenna – this should give us something ridiculous like 50ft+ of usuable Bluetooth range!
Resources
eBay - Apple Bluetooth Module
http://cgi.ebay.com/Apple-MacBook-A1181-Bluetooth-Module-A1114-/2607937…
http://cgi.ebay.com/Apple-MacBook-2GHz-A1181-Bluetooth-Module-Cable-A11…
eBay – Apple Bluetooth antenna
http://www.ebay.ca/itm/Apple-wifi-antenna-apple-bluetooth-mini-pci-card…
eBay – U.FL RP SMA Female 10" Pigtail Cable Mini-PCI UFL RG178
http://cgi.ebay.com.my/ws/eBayISAPI.dll?ViewItem&item=110538306742
eBay – TP-LINK TL-ANT2408CL 2.4GHz 8dBi Indoor Omni Antenna
http://cgi.ebay.com.my/TP-LINK-TL-ANT2408CL-2-4GHz-8dBi-Indoor-Omni-Ant…
1N400x Rectifer Diodes
http://en.wikipedia.org/wiki/1N4001_and_1N5400_series_diodes
More photos from this build
http://www.flickr.com/photos/l33tdawg/sets/72157627214780027/