


HITB: Review of the new Santa Rosa Macbook Pro
By: L33tdawg (with additional Macbook benchmarks by takizo and spoonfork)
Figure 1: The first boot-up
It’s been a week since I got my grubby hands on the new 15” Apple Macbook Pro’s and I’ve been loving every minute of it. I had initially planned to do a straight-through review but I figured a combination of a review in addition to a user experience report and a listing of some 'essential applications' would probably make for a more interesting read ;) Introduction
As mentioned in the Unboxing MBP article, the changes on the new Apple machines seem at first almost non existent (save for the new LED based display) and while the speed bump seems negligible, it’s worth keeping in mind that the bulk of the upgrade is on the inside. ;)
Below is a table showing the differences in specifications between the Revision B and these new models.
These new MBPs ship with Intel’s latest and greatest 965 chipset codenamed ‘Santa Rosa’ which sees the front side bus (FSB) speed now run at 800MHz from 667MHz, support for dynamic FSB switching which improves battery life by allowing the machine to be underclocked when idle and then there’s also the new 802.11n wireless networking support in addition to the new on-board NAND based technology known as Robson or Intel Turbo Memory.
Other upgrades and improvements from the Revision ‘B’ of the MBP includes the ability to address a total of 4GB of RAM (previous models were limited to 3GB even if 4GB was installed) and the new GPU; an NVIDIA GeForce 8600 GT sporting 128MB of VRAM in the entry level 15” model and 256MB in it’s bigger brother. Incidentally the 8600 GT supports DirectX 10 for those of you planning to do some gaming via BootCamp although I’m sure gamers would much prefer buying something like Alienware if they really wanted portable gaming power.
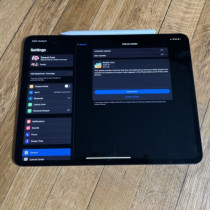
Figure 2: This isn’t my first Mac but I’ve never failed to be impressed by how seamlessly OS X detects and configures the machine as it’s booted up.
I can see clearly
Figure 3: The new LED based displays are certainly a lot brighter
What could be one of the most anticipated upgrades to the MBP (if the above improvements weren’t already good enough) was the inclusion of the new LED backlight displays. Apple claims these new LED displays (in addition to being less harmful on the environment) improves battery life adding anywhere from 30 to 60 minutes of extra juice. The Apple site lists battery life for the new models at 6 hours (up from 5 in the previous iteration) although I think an additional 30 minutes of usage is a more reasonable expectation in the real world.
One thing you’ll notice straight out of the box is how bright these new displays are; on full brightness I honestly found the display ‘too bright’ for my liking. Viewing a similar image side by side with the Dell Inspiron 6400 and the difference between LCD and LED is really clear – for starters the entire brightness across the screen is a lot more even and small fonts appear crisper. Of course the Dell display is certainly not new and I have to take into consideration the aging factor.
It’s getting hot in here
Having read the horror stories on the various Mac forums about how hot the new Intel based Apple machines were, I was certainly concerned (especially seeing that I live in Asia where the ambient air temperature is ALREADY 33 – 34 degrees Celcius!).
On the default fan setting of 2000 RPM, I found that the top left hand side of the unit got particularly HOT even after just half an hour of use. Temperature readings from CPU A was steady at 62 – 63 deg C and the case bottom at a balmy 40 deg C – Even though I use my machine on a desk, the CPU temp was starting to get me a little worried considering I hadn’t even begun to start pushing the machine.
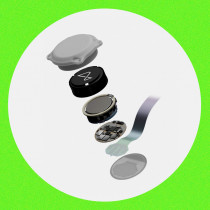
Figure 4: The smcFanControl preferences pane
Thankfully it seems the default fan speed (as determined by Apple) was just too low and a quick fix was to use SMCFanControl to bump up the fan speed to 3000 RPM. Things improved tremendously thereafter with the enclosure bottom now reading at 33 deg C and the CPU temp at a much more reasonable 45 deg C. With Firefox, Adium, Thunderbird, RealPlayer, Skype, Terminal, Azureus, Preview, Dashboard and iCal running concurrently, the CPU temp hovers in the 52-55 deg C and the only time I’ve seen it hit 70-72 was during the benchmarking session. Even then, the bottom of the case enclosure never went above 36 deg C throughout. Perhaps a little too warm for the lap but certainly nowhere near burning as some users have reported.
Benchmark Time
Now the part that I guess most of you are interested in – how well does this new hardware perform. I ran 2 benchmarks - XBench 1.3 and CineBench 9.5 with a fresh reboot between testing. In addition, each test was run on a freshly booted system with limited apps running and all systems were running OS X 10.4.9 with all the latest patches.
In order to really give you guys some form of comparison on the speed increase between this new 965 chipset and the older architecture, the MBP was tested against the following:
1.) MacMini CoreDuo 1.66GHz with 2GB RAM @ 667MHz
2.) White MacBook Core2Duo 2.0GHz with 2GB RAM @ 667MHz
3.) Black MacBook Core2Duo 2.0GHz with 2GB RAM @ 667MHz
(Much thanks to takizo and spoonfork for ‘donating some CPU cycles’ with some remote benchmarking of their own Macbooks to add to the numbers!)
As you’ll notice, all the machines have the same amount of RAM running at 667MHz – this was to try and isolate the benchmarks and focus solely on the raw performance increase of the processor and faster FSB. Of course the other big difference we wanted to take a look at was the GPU – the MacMini sports a GMA950 with 64MB shared VRAM which is the same as what the Macbooks run and the MBP with an NVIDIA 8600 GT with 256MB of dedicated VRAM.
As you can see from the Cinebench scores, the MBP totally whopped the rest of the machines thanks to the 256MB of dedicated graphics RAM. This is certainly most apparent in the OpenGL Hardware Lighting where the 8600 GT scored 3948 points whereas the GMA950s averaged 1500 and the Mac Mini managed only a paltry 1152 (even though the gfx chip is the same, the Macbook's are on Core2Duo whereas the mini is only on CoreDuo). The new 965 chipset and marginally faster processor gave the MBP a slight advantage in the other tests especially the Software Lighting and the single/multi CPU rendering.
The XBench scores are quite interesting with the MBP clearly leading the pack once again except on the OpenGL test in which it placed even lower than the Mac Mini! This was certainly quite surprising considering the earlier numbers from Cinebench – After some digging around on various sites, it seems these low XBench OpenGL numbers are popping up elsewhere too. The issue apparently comes down to drivers. With ATI being sold to AMD, Apple made the switch to using NVIDIA hardware starting with these new MBPs – the only problem with this is unlike the ATI drivers which have been in use on OS X for quite some time, the new NVIDIA drivers are apparently a little bit less mature. Hopefully a future Software Update addresses this issue, but as it stands, the MBP is clearly winning on sheer brute force.
Should you get one?
Personally I’m tremendously happy with my purchase – I’ve been meaning to get a MBP and the upgrade to Santa Rosa certainly made this a good a time as any to pick one of these babies up. However, if you’ve just recently purchased a Core2Duo MB or MBP don’t feel bad - the performance increase and faster FSB on these new machines while noticeable is certainly not earth shattering. On the other hand if you’re on the look out for a wicked mad piece of well designed hardware; look no further :)
If you’re a first-time switcher to OS X from Windows, you’ll need to be prepared to spend some time to re-learn certain things - however if you give yourself enough time, you’ll not only grow to love OS X and the way things are done – you’ll wonder how you ever got by without it!
The Essential Selection – OS X Applications
While OS X is definitely a brilliant operating system, it is not without its faults and like any good hacker you’re always looking for ways to make things better – below are some essential applications which I’ve found will make the OS X experience that much better for normal and power users. Do note that not all the tools are free – some are commercial while others are fully functional shareware.
In no particular order…
1.) Quicksilver – this is a really super piece of code – a quick launch system that learns as you use it. It takes some getting used to and you’ll need to tweak the settings till you get it working the way you want, but it’s definitely well worth the effort. Spend enough time with it and you’ll really feel your productivity increase as you seamlessly launch programs and switch windows without using your mouse/trackpad.
2.) Adium – The one and only IM client you’ll ever need. It’s got support for MSN, ICQ, Yahoo, GTalk, AIM and Yahoo to name a few. The best feature by far is the OTR encryption support that comes default giving you on-the-fly encrypted chat between clients that support the OTR protocol.
3.) VLC for OS X – Quicktime is good; VLC is better. I’d also recommend getting Flip4Mac – a WMV plugin to allow Windows Media playback in OS X and of course Real Player for BBC’s Radio 1 :)
4.) PathFinder – A Finder replacement with a MUCH BETTER search interface. This is one seriously powerful app and I’d recommend using it in conjunction with Finder until you’re absolutely ready to have it replace Finder 100%.
5.) A Better Finder Rename – Not to be confused with PathFinder, A Better Finder Rename is a great tool for bulk renaming files although the tool is a lot more powerful than that. Worth checking out if you routinely have to rename photos to something a little more meaningful than DSC001, DSC002 etc.
6.) Audio Hijack Pro – A great tool for ripping audio streams for later playback. I have yet to find an easier way to grab audio out of basically any application running on the system.
7.) Azureus – The best Bit Torrent client - period. Their new Vuze client is pretty sweet although you’re going to need a pretty hefty net connection to really enjoy it. That being said, I’ve been using Azureus on Windows in the past and the OS X client is thankfully just as polished.
8.) CyberDuck – Sure you can SFTP and FTP from the Terminal but having a drag and drop interface is nice in addition to the fact that CyberDuck resumes the connection the next time you open it bringing you back to the last directory you were in. Sweet.
9.) Firefox – The only web browser you’re going to need – unless of course you’re migrating from Windows and still need to access some obscure ActiveX type web application. In which case you could still get your groove-on by running Internet Explorer 6 or 7 via Parallels or VMWare Fusion.
10,) AppZapper – Installing and Uninstalling applications in OS X is a simple
drag and drop affair, however, when uninstalling applications, simply dragging them into the trash doesn’t truly remove all the configuration files and other bits of code. That’s where AppZapper comes in – instead of dragging your app into the trash, just drag it into AppZapper and a list of all the files that will be removed is shown. Click Zap and you’re done.
The Essential Selection – OS X Widgets
1.) iStatPro – This should be one of the default widgets that ship with OS X. An invaluable tool for keeping an eye on your machine’s health
2.) Wikipedia Widget – Search Wikipedia directly from your dashboard.
3.) Midnight – This is purely for the MB and MBP users. A widget to put your machine into ‘deep sleep’ or ‘safe sleep’.
Normally when you close the lid on your machine it just saves the current state to RAM and keeps the machine in a semi-awake state. This draws minimal power from the battery however if you do run dry, you may very well lose data. With ‘deep sleep/safe sleep’, the systems state is written to the hard drive. The only minor drawback is the slightly longer time taken to ‘wake up’. I use this only when transporting the machine – and normal sleep when connected to a power source.
4.) iCal Events – A dashboard widget which shows a quick view of your iCal appointments
5.) Bluetooth Texter – Got a Bluetooth enabled cell phone? This little widget allows you to send SMS messages directly from your dashboard without having to pick up your phone – pity however that it can’t read incoming messages from the phone; at least not yet.
Not really essential applications, but worth a look…
1.) CandyBar – tired of the old normal looking OS X icons – while we wait for the new eye candy that Leopard offers, CandyBar is a cool little tool to change your system icons with ease.
2.) Application Enhancer + Pull Tab + Witch – A combination which will give you better control of application switching in OS X.
One particularly annoying default behaviour of OS X (to me anyway) was the fact that there was no easy way to cycle through all open windows – you could either cycle through app open applications (apple+tab) or all open windows within the current application with (apple+`). Installing Application Enhancer with PullTab and Witch will enable you to now have access to all open applications+windows through the traditional apple+tab keyboard shortcut. If you’re coming to OS X from Windows, you’ll definitely like this one.
3.) smcFanControl – This is definitely worth getting if you find your MB/MBP is too warm for your liking. I’ve gone and set up 3 different profiles – the default (2000 RPM), medium speed (3000 RPM) and high (4000 RPM). On the high setting the fans are audible but you have to listen closely. The max speed setting is 6000 RPM. I keep mne on the medium speed and have not found any (noticeable) detrimental effect on battery life.
4.) Desktop Manager – When SJ demo’ed Leopard for the first time at last year’s WWDC, he showed off a new virtual desktop manager called ‘Spaces’ which basically allows users to group applications as they wished into separate desktops or ‘spaces’. Virtual Desktops are certainly not new (they’ve been around on Linux since RedHat 6.2 if I remember correctly!) so it’s surprising that they’ve taken so long to make an appearance in OS X. Either way, Desktop Manager serves up its own version of ‘spaces’ and it’s pretty tasty indeed – you get some nifty little animation effects as you switch desktops and almost everything is tweakable in some way or another.
5.) OnyX – An optimization and maintenance tool, OnyX is definitely worth having around just incase you need it. It also allows for tweaking of some hidden parameters in OS X that you would normally not have access to.
I’m sure some of you have noticed that neither Parallels Desktop nor VMware Fusion are on this list as an essential app – that’s simply because it’s not really fair to recommend either one at this point in time seeing that VMWare is currently in beta. However, from what I’ve seen thus far, the full release of Fusion should be very interesting indeed!
Anyway, If you’ve got an essential app that I’ve not listed, please feel free to post some details in the comments segment.